If you are looking for cinematic street portrait recipe custom film simulation settings for Fuji X-Trans IV cameras, you have come to the right page.
Introducing ‘Downtown Bloom‘, a unique custom film simulation that lets you create cinematic dreamy still portrait SOOC images, straight out from your camera without using any editing software.
If you are a creative content creator and creative photographer, this custom Fujifilm X-Trans IV portrait recipe is great for street portraits, street fashion shoots and creative outdoor portraits.
What is Downtown Bloom Film Simulation Recipe all About?
Let me explain a little about this Downtown Bloom custom simulation as you need certain ‘camera gear’ to achieve the cinematic bloom effect which I will explain below. Listed as one of the best Fuji recipes, the Downtown Bloom recipe is the latest addition to the X-Trans IV film simulation recipes I’ve created.
For this recipe, I am using Classic Chrome as the base film simulation (one of the best portrait film simulations, IMHO) combined with colour and shadow adjustment, which creates a golden brown tone for your SOOC images. I turned off the Grain Effect and Sharpening remains default at 0.
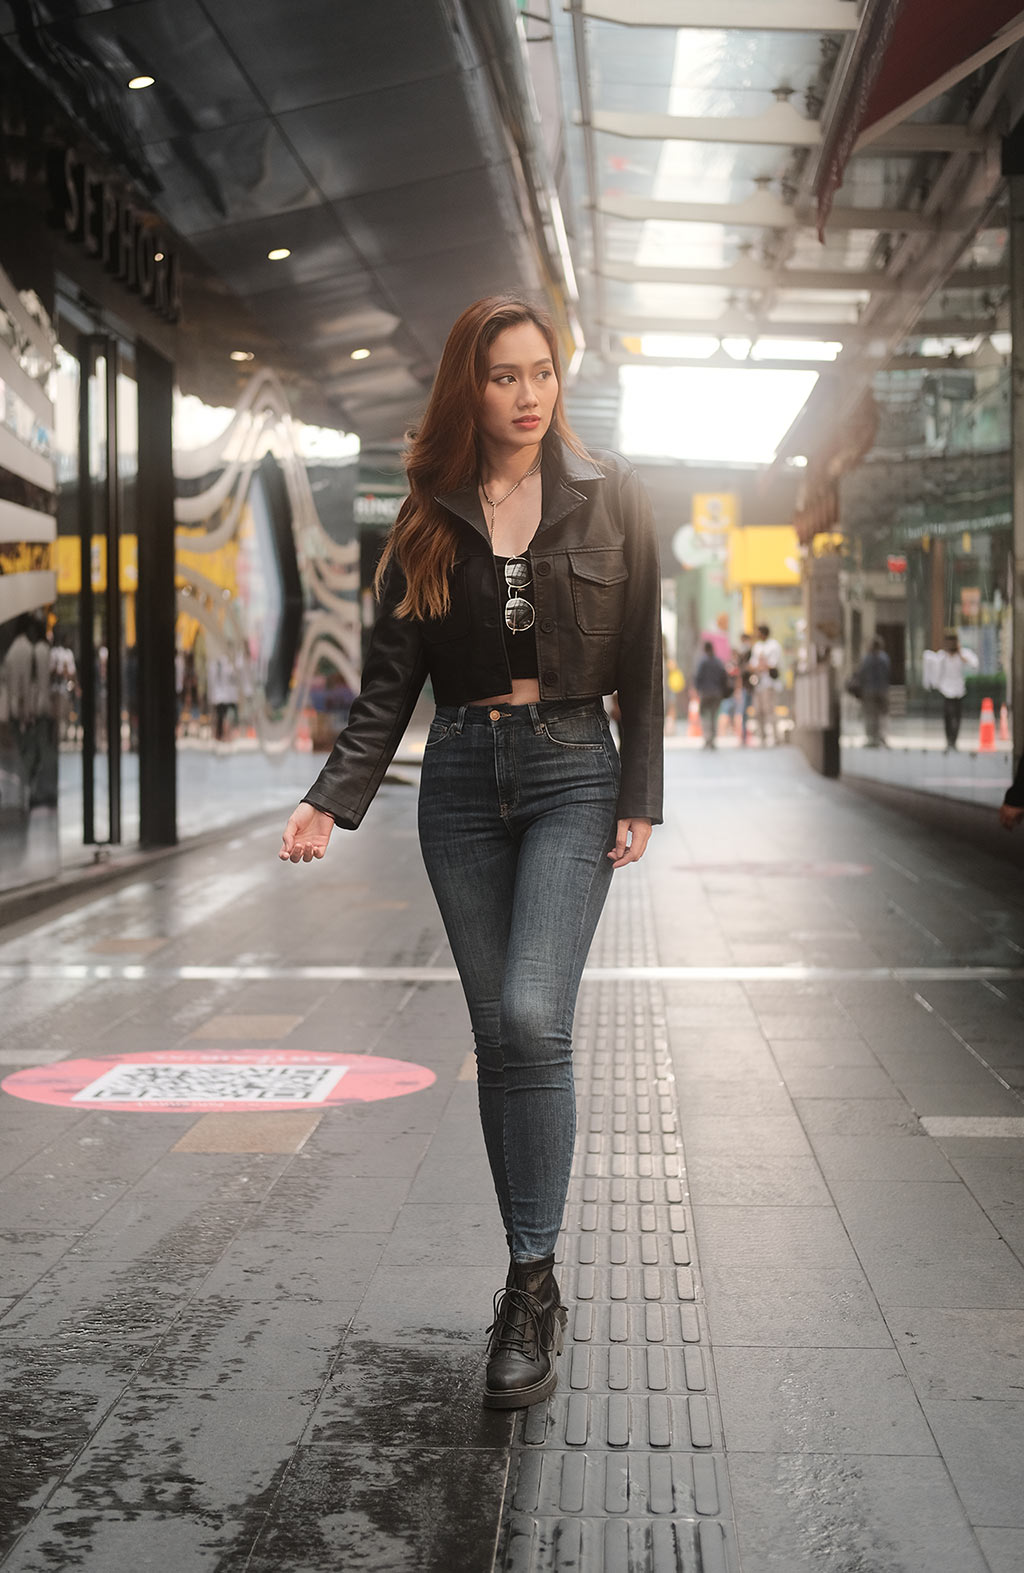
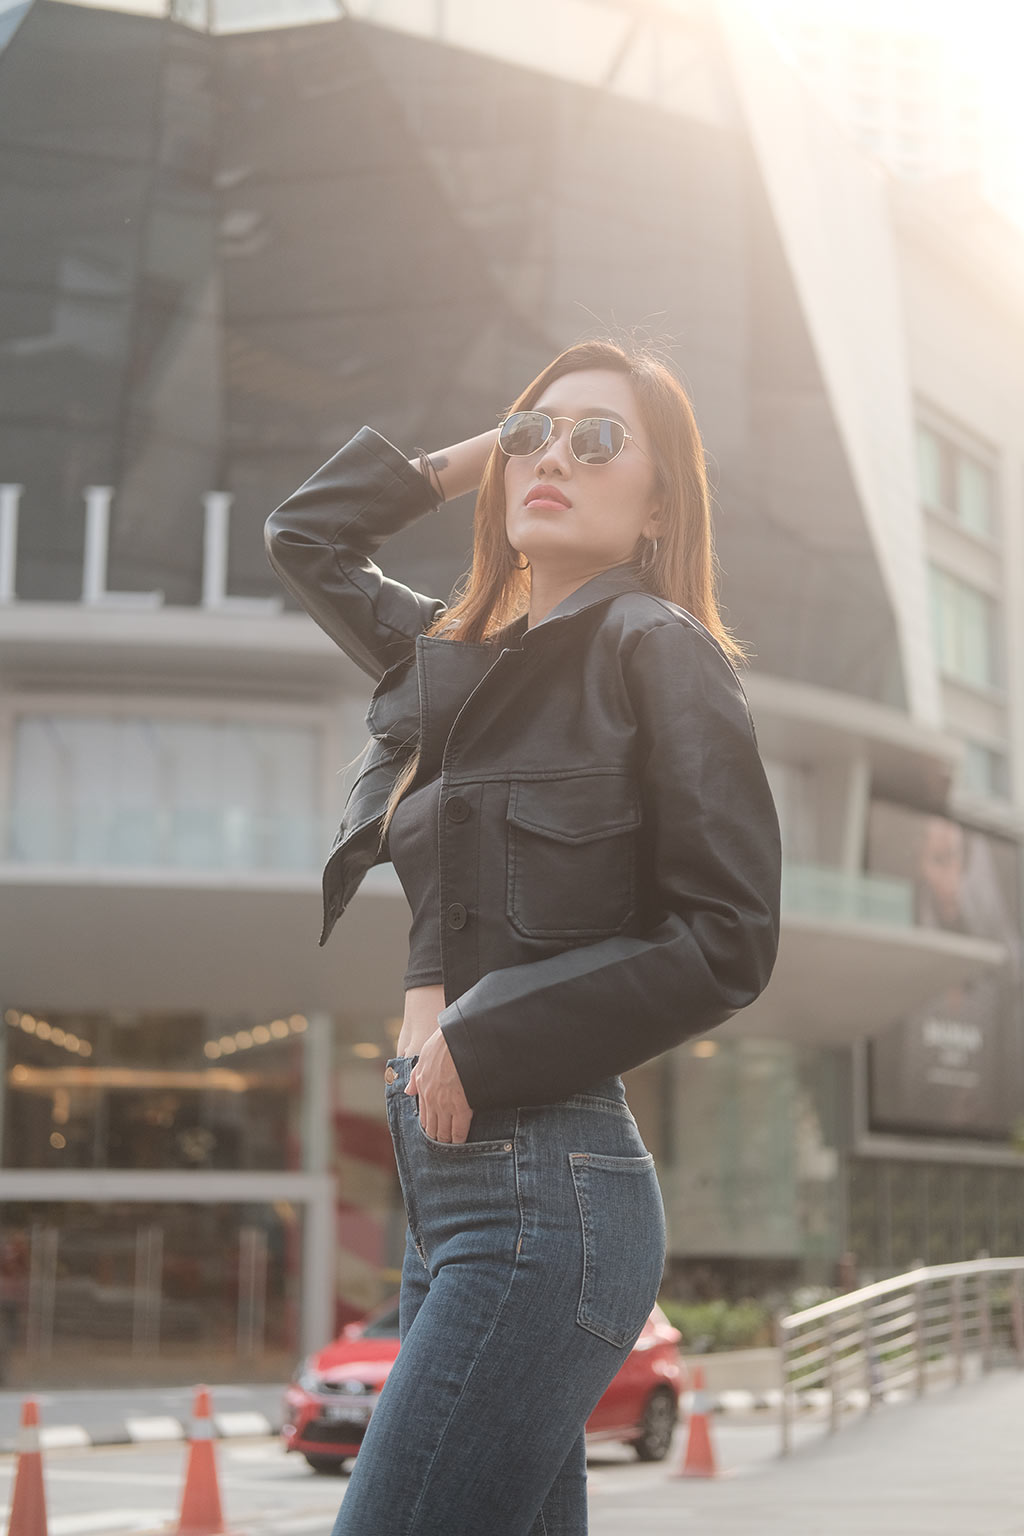
It is very suitable for street fashion shoots in the city with skyscraper buildings or shopping districts. Also by increasing the colour and shadow, it will create a high contrast to your images.
This street portrait recipe is slightly different from the Classy Glow, Urban Chic & Retro Allure fashion film recipe and similar to the Kodachrome Film Classic recipe with a little fine-tuned for street life and people photography. The newly created High Fashion SOOC recipe is an alternative to achieving a high-contrast fashion style.
You can use Aperture Priority mode when shooting street fashion portraits and it is the easiest shooting mode to use for fast shooting. Yes, you can shoot with either Aperture Priority or manual mode when in need, e.g. in harsh sunlight.
Use the Exposure Compensation to control the exposure, adjust according to your mood, and whether you want your images to look brighter or more contrast and shadow.
Downtown Bloom Street Portrait Recipe Custom Settings
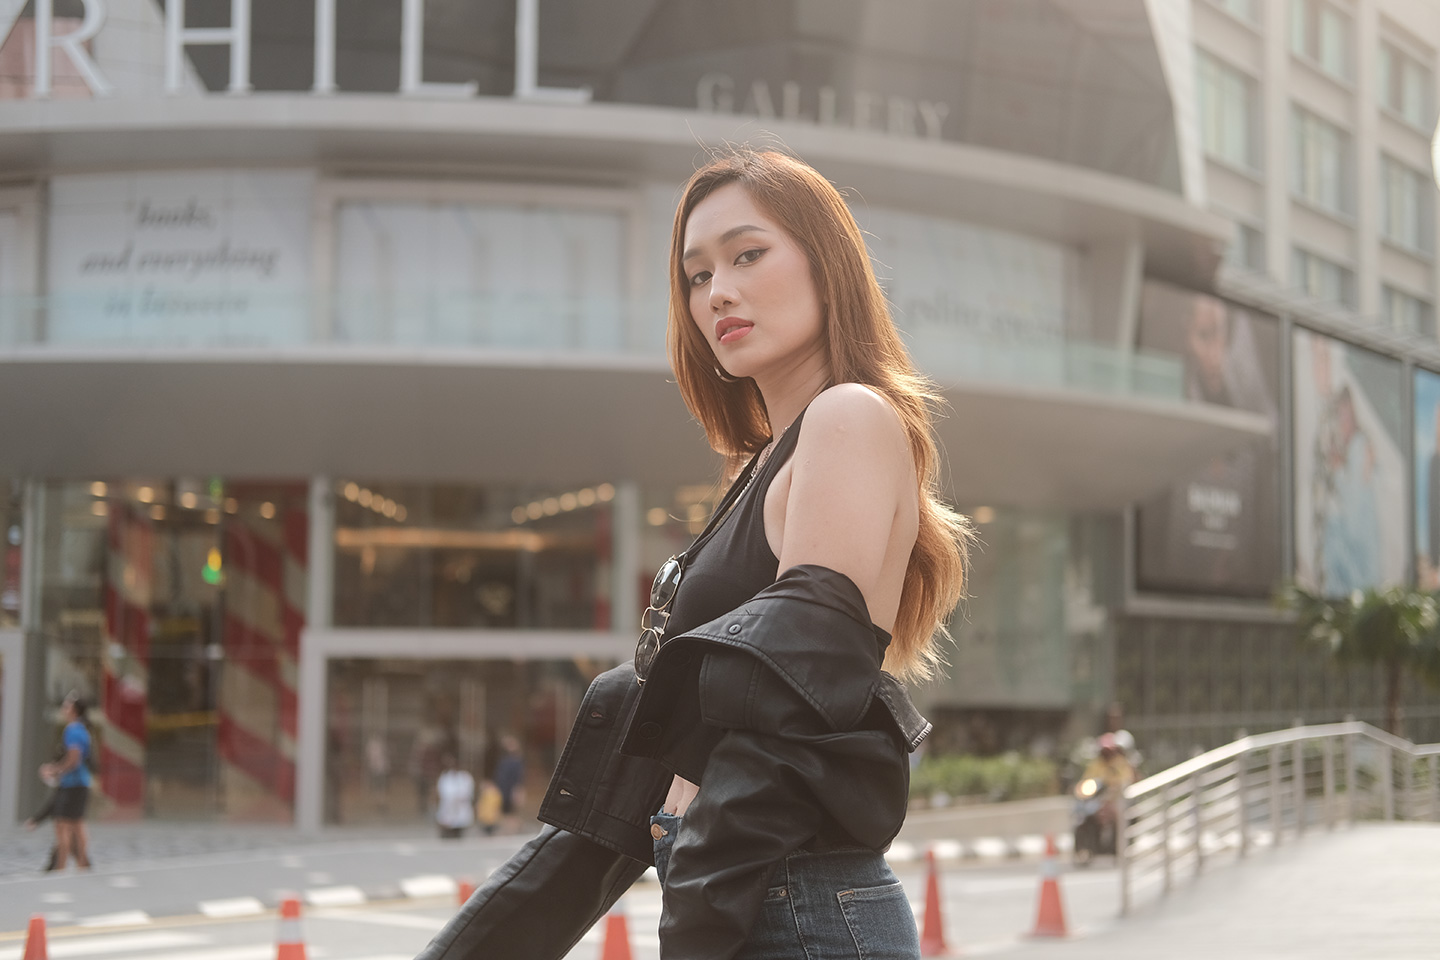
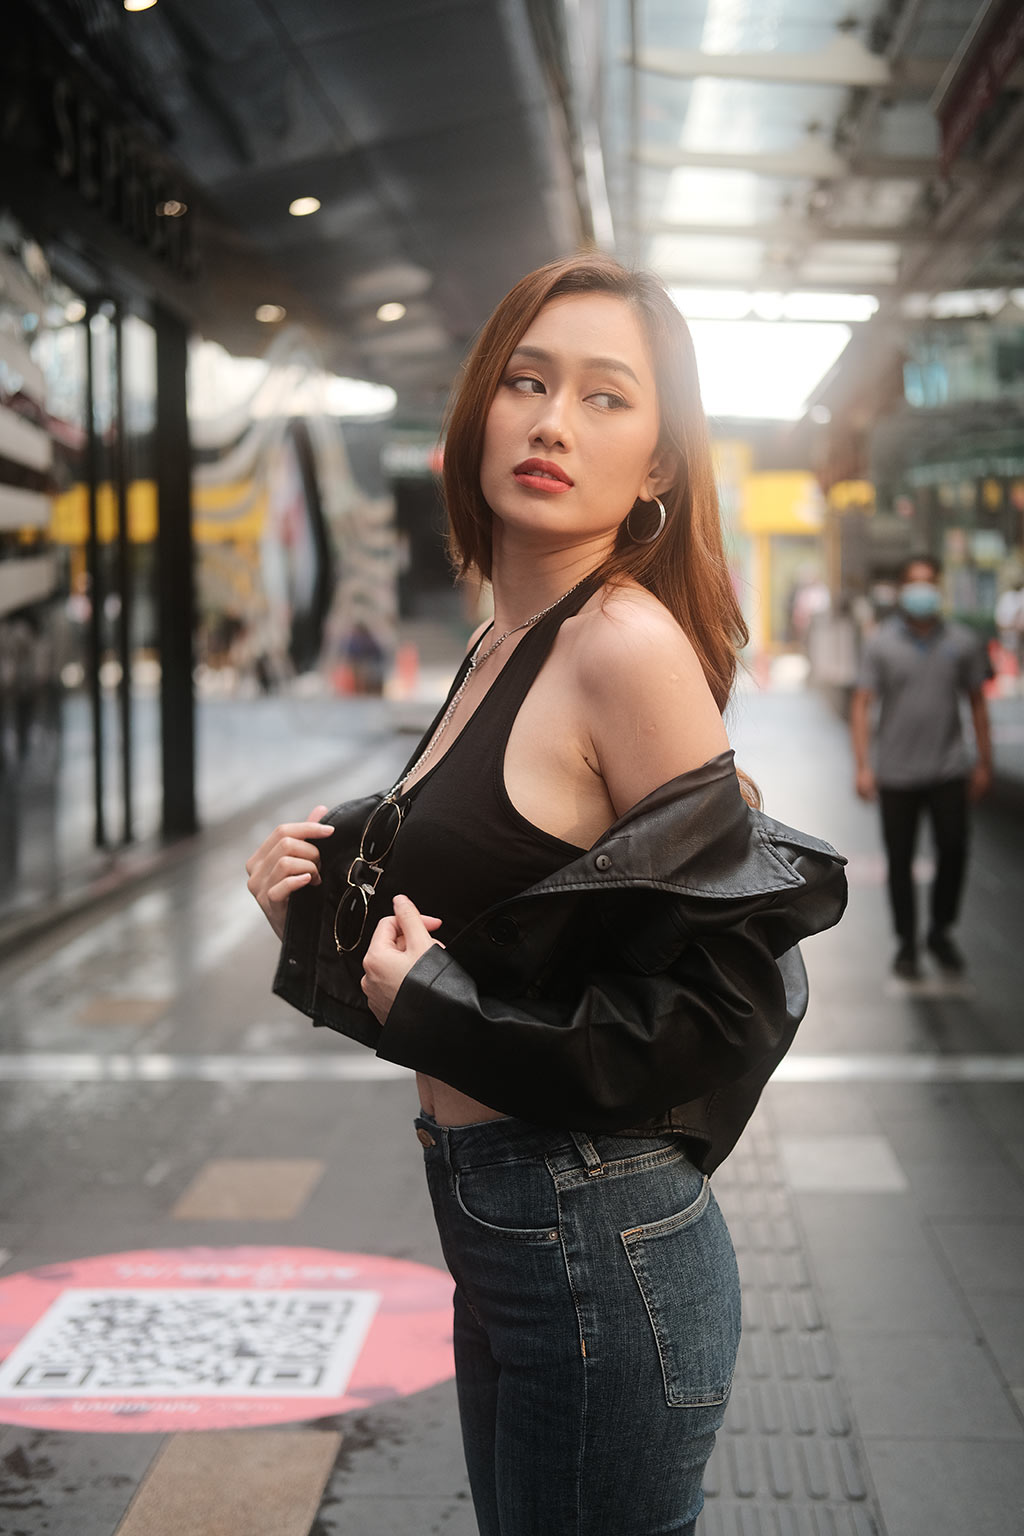
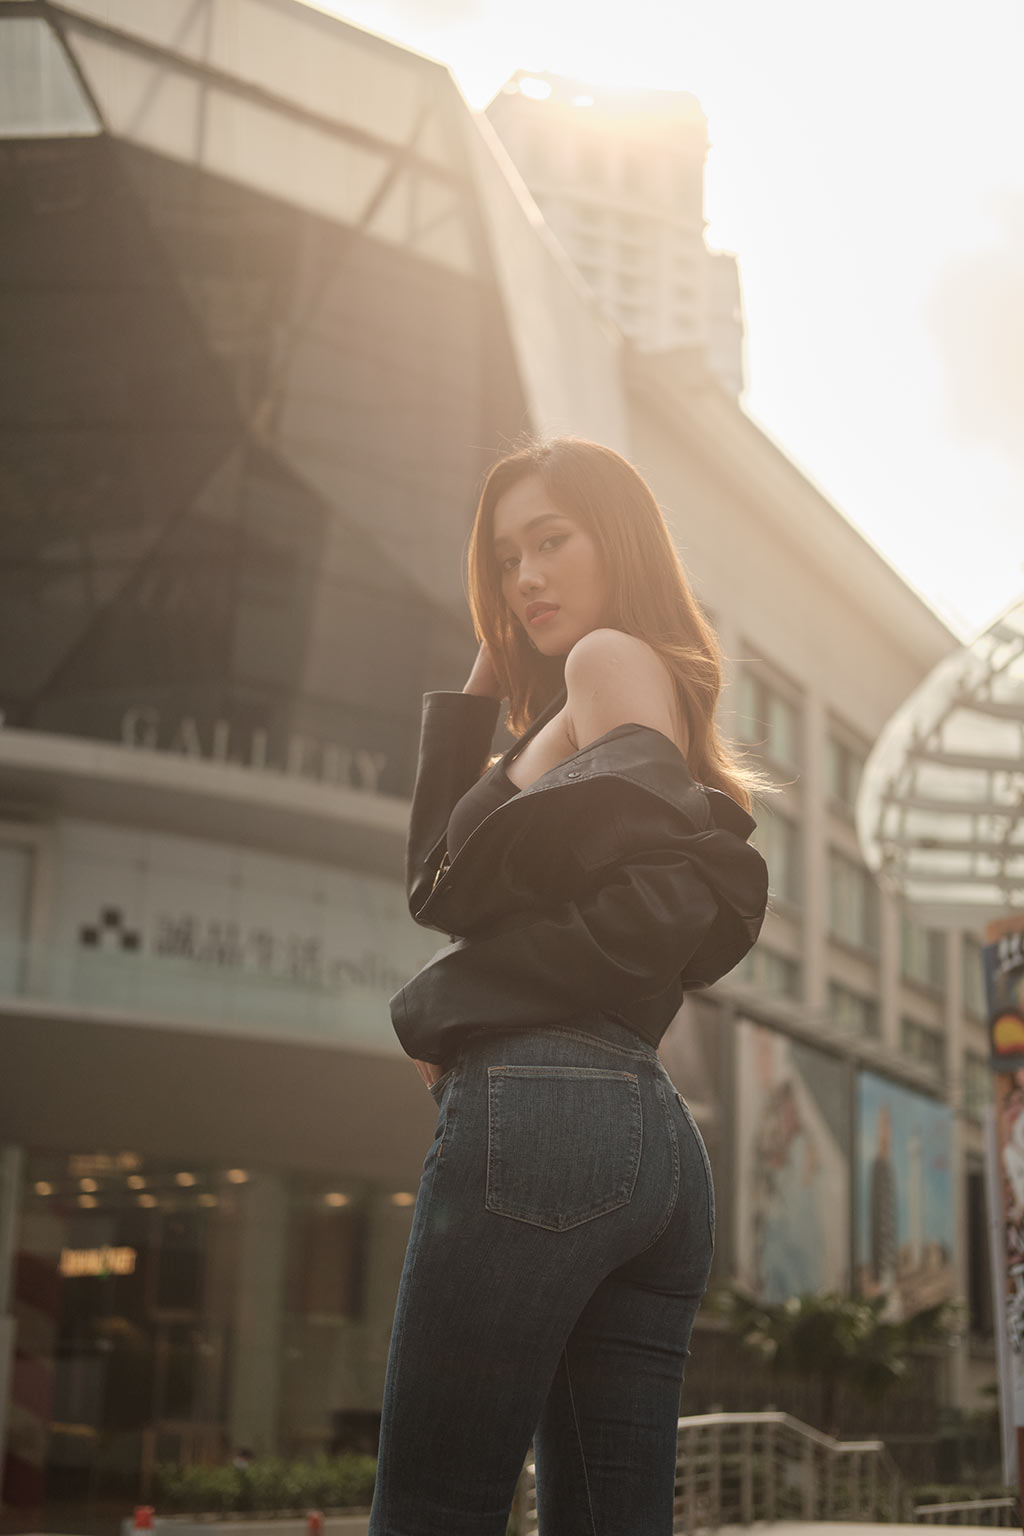
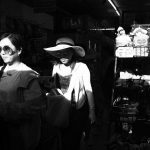
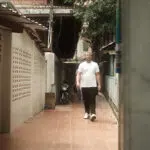
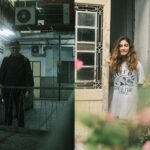
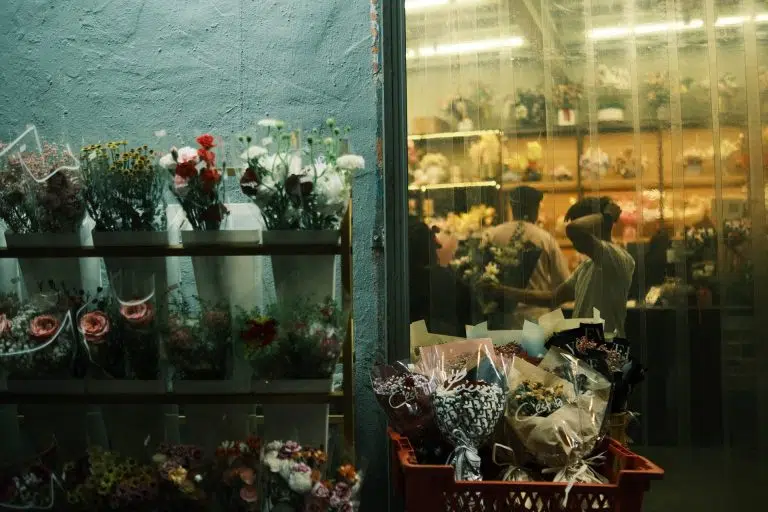
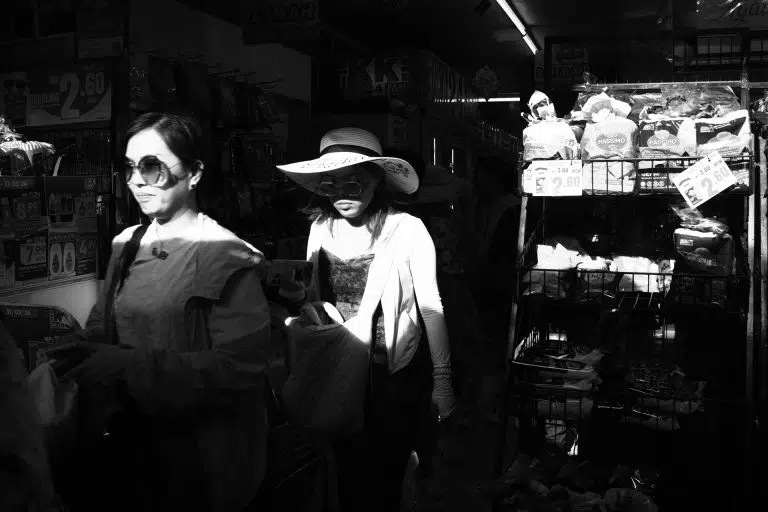
Downtown Bloom Sample Photos
Here are a few SOOC images I shot during my street fashion photoshoot in Bukit Bintang, a popular shopping district in Kuala Lumpur. All the images are straight out of the camera, which made it easier for me to quickly share my talent online or on social media.
What Camera Gear Do I Need for this Recipe?
Now comes the magical part on how to create these cinematic bloom effects. All you need is a high-quality creative FX filter. Check out my diffusion filter guide if you want to know more about the products.
I am using the Moment Cinebloom diffusion filter with 20% density to diffuse the highlights and lower the contrast on the high contrast settings which I’ve mentioned above. Sound weird, but it will create a really nice cinematic bloom.
I really love the Cinebloom filter more than the K&F diffusion filter. There is a huge difference between the two brands when it comes to quality.
All you need to do is to be creative and find a good shooting spot with good lighting in the city. The most suitable time to shoot in order to create these cinematic bloom effects is during the golden hours either in the early morning, sunset or even at night!
You can learn more about shooting portraits during golden hours in my outdoor portrait guide.
Well, let’s hope the Fujifilm film recipes fanboys and portrait photographers out there will like this new ‘Downtown Bloom’ street portrait recipe. Feel free to share this post with your friends if you like this custom recipe.
Happy shooting SOOC!
The photos above are shot with the Fujifilm X-T4 – AmazonUS


This Post Has 9 Comments
Pingback: Staycation In Georgetown - Eat, Drink & Street Photos | IvanYolo
Pingback: Classy Glow - Fashion Portrait Film Recipe For Fuji X-T4 | IvanYolo
Pingback: KL Street Fashion Weekend - Fun Portrait Session In Bukit Bintang | IvanYolo
Pingback: Nomadic Mood - Travel Film Simulation Recipe | IvanYolo
Hello,
I am a fan of Chinese photography,I really like these sample photos. but in fact the effect of this recipe applied to X-S10 is generally green, which is quite different from the effect of the sample (the white balance setting seems to emphasize the green tendency). why is this ?
Love your work and thank you。
Hi Daxiong,
Kindly adjust to the correct White Balance Shift to +3 Red & -4 Blue for this recipe. I’ve corrected the post. Sorry for any inconvenience caused.
Thank you and happy shooting
Best regards,
Ivan
Hi Ivan
Thank you for your reply. Adjusted white balance shift to get beautiful colors, a perfect recipe, I like it very much, thank you for your guidance,
Best regards ,
Daxiong
Hi Daxiong,
You are most welcome! 🙂
Best regards,
Ivan
Pingback: Vibrant Dream - X-Trans IV Portrait Film Simulation Recipe | Fuji X Portrait